

Camp Tea & Coffee · A RidgeSong field guide
Camping Pour-Over Coffee: What to Pack and How to Brew
Give each part of your camp coffee kit a clear job. Learn what to pack, how to organize a repeatable pour-over routine and where a controlled-pour pot fits.
Before you begin
- Give the pouring vessel, brewer and cup separate jobs.
- Pack the matching filter and a way to collect used grounds.
- Rehearse your chosen brewing routine before the trip.
In this guide 0% read
Give Each Piece a Clear Job
For camp pour-over coffee, separate the setup into four jobs: prepare the water, hold the coffee and filter, receive the drink, and carry everything home afterwards. Once those jobs are clear, it is easier to see what you need and what can stay in the cupboard.
The pouring vessel is one part of this arrangement. You also need a suitable brewer or dripper, its matching filter, coffee and a receiving cup. A lid that helps guide water does not replace the brewer or coffee filter.
Decide Whether Pour-Over Fits the Morning
Think about the time and attention you want to give the drink. Pour-over asks you to set out several pieces, manage the pour and deal with wet grounds. That can be an enjoyable part of a slow morning. On a brief stop, a simpler method may fit the schedule better.
Count how many drinks you will make. One cup brewed directly into a mug is a different task from serving several people. Check the capacity of the dripper and receiving vessel before deciding whether to make one batch or repeat the process.
Pack a Complete Coffee Kit
Your preparation checklist
0 / 7 packedTick off the list as you prepare for your trip.

Grinding and portioning the coffee at home can reduce the equipment you carry. Keep the coffee in a dry, sealed container. If you prefer to bring a grinder, include it in the total kit weight and give it a protected place in the pack.
Check the brewer's fit on the exact cup you intend to use. Look at where it rests, how the filter sits, and whether you can see the level in the receiving vessel. Do this with unheated equipment before the trip.
Choose a Recipe You Already Understand
Use the coffee producer's or brewer's guidance as a starting point, especially for grind size, water quantity and temperature. Save those instructions with your packed coffee. A routine you have tried at home gives you a more useful reference than adjusting every variable at camp.
Write down the coffee amount and total brewing water for one serving. Keep rinsing water separate from the recipe quantity, and remember that some water remains in the grounds. The water you pour through the brewer and the drink that reaches your mug are not identical measurements.
If you will leave the scale at home, portion the coffee beforehand and use a suitable way to measure the water. Avoid estimating a large batch from a vessel's brim capacity. Leave the working space required by your equipment.

Read the video captions
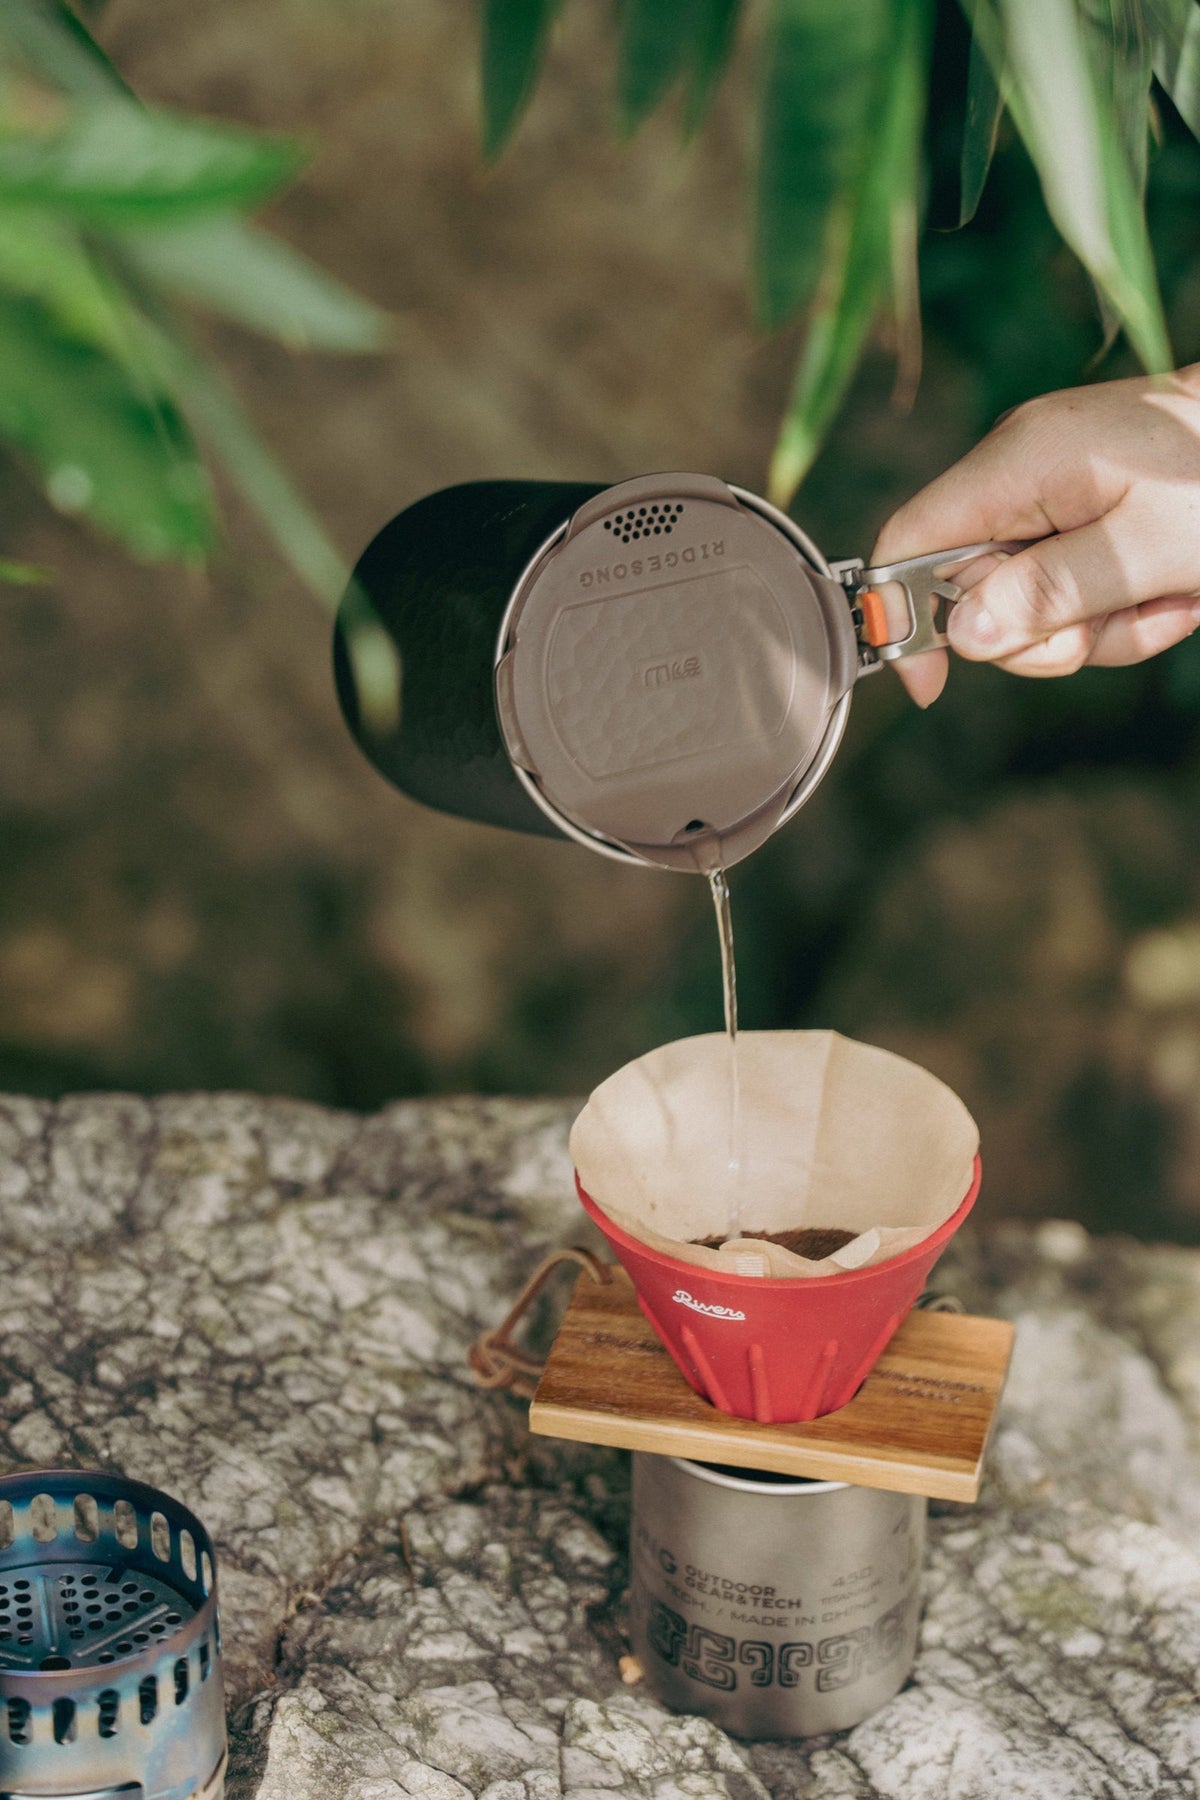
The pot is held over a paper-lined dripper. Water is poured through the coffee bed. The pot is set down.
Follow the Brewing Sequence
1. Prepare the Filter and Receiving Cup
Set the brewer on its receiving vessel according to its instructions, and insert the matching filter. If your brewer's method calls for rinsing the paper, account for that water and empty the receiving vessel before brewing. Make sure the arrangement remains stable.
2. Add the Portioned Coffee
Place your measured grounds in the filter. Keep the remaining dry coffee sealed and away from splashes. Have the full recipe available so you know how much water you will add and whether the method includes an initial wetting stage or timed pauses.
3. Pour According to the Brewer's Method
Prepare the water with suitable equipment and follow its handling instructions. Pour in the sequence your brewer recommends, keeping within both the filter's and receiving vessel's capacity. Watch the water level as it drains; pause when necessary rather than adding the whole amount at once.
The goal is a repeatable routine. Use the same coffee amount and water quantity while learning how your equipment pours. Change one variable for the next cup so that the result tells you something useful.
4. Let the Brew Drain and Clear the Setup
When the brewing sequence is complete, let the remaining liquid drain according to your method. Move the used brewer to a stable place before picking up the drink. Handle hot vessels by their intended grip points and allow the coffee to reach a comfortable drinking temperature.

Where the RidgeSong Pot Fits
The Tea & Coffee Fusion Titanium Trekking Pot has a multifunction lid designed to guide a narrower pouring stream. It also has a separate titanium lid for its cooking role.
For a pour-over setup, think of the pot as the water-preparation and pouring vessel. Choose a separate compatible brewer and filter for the coffee. Check what is included with the product you select; coffee, filters and other items shown in a scene should not be assumed to come with the pot.
A receiving mug, such as the Tea-Infused Ti Mug 450, completes another part of the setup. Confirm the dripper's physical fit and working capacity with your exact mug. The tea-strainer lid has a different job from a coffee filter.
Clean Up for the Walk Home
Collect the used filter and grounds in your waste container. Follow local site rules for washing and wastewater, using designated facilities when available. Keep wet brewing pieces separate from dry coffee until you can clean and dry them properly.
After the trip, note which pieces made the process easier and which went unused. If controlled pouring is the part you want to improve, explore the trekking pot's lid and handle details and check how they fit the brewer you already enjoy.
Equipment in this guide
A closer look at the pieces.


Keep your plans moving
Where to go from here.

Decide which pot and cup to carry
Choose the vessels that support your coffee and meal routine.

Make Tea While Camping
Choose tea bags or loose leaves, pack a complete brewing routine and learn where a strainer-lid mug fits. A practical guide to making and cleaning up a cup outdoors.